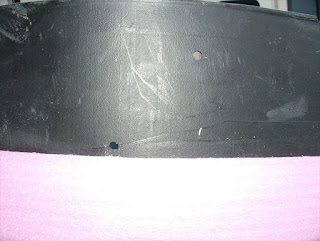
Ok to start, I took a black plastic 55 gallon drum formally used to hold a concrete curing chemical. NON- hazardous.
Using a jig saw, I cut the top of the drum off at the height I wanted the cauldron to be.
After the top was off, I used a hand sander to get the rough edges off. This step is totally up to you since we are going to be putting foam rubber pole covering on the top edge later in the tutorial.
I took the pink roll of Dow Sill Seal and put it around the drum and cut it to size, then took that piece to make 3 more strips the exact same size. Then sprayed 3M adhesive on the back of the smooth side of the first strip. Then I raped it around the top of the drum. After that I took another strip of and sprayed the inside (ridged side) with 3M and put it right over the top of the first piece making sure that it sticks to it. Then did the exact same thing for the bottom ring. Now I did not measure anything on this and you can easily see that from the pictures. But hey, I figure its gonna be dark and the cauldron isn't gonna be in a place that you can pick out the imperfections.
Then taking foam balls of 2 different sizes (2 med balls and 2 small balls) (med ball being about the size of a soft ball and the small ball being about the size of a baseball) I used my foam cutter to cut them exactly in half. I only used 3 halves on the cauldron. I put the med ones on top and small ones on bottom. I used clear liquid nails to attach the balls to the foam strips. Remember that some glues will eat foam. I have found that liquid nails works best.
So here I have taken 2 pieces of wood and cut them to be identical. Then also took 4 pieces of 1" thick pink foam and using my foam cutter I cut out all four foam pieces like the ones in the pictures below. After these were cut out I used 3M spray adhesive to stick the two pieces together. Once dry I used a hand sander to sand the edges smooth and round and the bottom flat. It is up to you how big to make these... I also drilled 2 holes in the wood for mounting later. I also placed the wood pieces on the drum where I wanted them and drilled the holes for the bolts.
I took a pen style soldering iron and burned the holes for the ring to go into after painted and mounted. Don't get to close to the edges, when this stuff melts it goes farther than just where the iron is...
I used liquid nails to attach the foam to the wood. Once dry I bolted them to the drum
I used liquid nails to attach the foam to the wood. Once dry I bolted them to the drum
I used black latex house paint that I got mixed at home depot to paint the whole cauldron with. Just using a brush I painted everything on the outside.
Ok so here I used spray paint to make a rusty look. I used hammered copper color and hit the foam balls, ring holders & the ring harder to make them stand out but lightly sprayed the entire drum for a rustic aged look.
Here I have made a wood frame for the bottom of the cauldron so the fog pipe can fit in the bottom and have outer support. The frame was made out of 2x6s. I just used sheet rock screws on the inside of the cauldron to attach the frame to the cauldron. The fog tube is made from 1" black PVC with a 1" to 2" 90degree angle to go into the bottom of the cauldron. At the end of the frame I used a strip of plumbers tape to set the fog tube to the right height for the fog machine.
Here I have painted the frame with black house paint. After the paint is dry take whatever color Christmas lights you want the fire to be and staple them from one end under the cauldron on the frame to the other and back until you run out of light string. Make sure you start with the plug-in end of the light string with the plug-in being at the back of the cauldron.
Here is the cauldron with fog and lights plugged in.
For testing purposes I through a string of color changing Christmas lights in the cauldron with a small strobe light. This makes the fog change colors.
Original Author: DJ Kammo
Original URL: http://www.kammoslair.info/Cauldron/Cauldron.htm


